
In the middle of our basement renovation we realized we had to do something about a damaged wall. After tossing around some ideas we decided to try our hand at a DIY accent wall. These look great in living rooms so we hoped it would translate to a basement too. It was an easy project that we were able to complete in 1 day!
If you’ve stuck with me over the last 2 posts about our basement you deserve a prize. I know they’ve been long but I hope that they’ve helped you really understand where we started and helped you walk through the process with us. At the end of the last post the ceiling was done but I said that we still had more to do down there. Is it just us or do your projects tend to spawn more projects as well? In our case, when we bought the house we knew the basement needed new paint, carpet, and something done with the ceiling. We didn’t realize that there was also a wall that would need to be dealt with until after we’d been living here. The wall behind the bar area had bead board, not drywall, due to foundation work the previous owners had done. In our minds that wall was always going to be home to some sort of built ins. I think originally we had envisioned floor to ceiling bookcases, or maybe something like Thrifty Decor Chick did in her old dining room. So when we began working on the ceiling we really didn’t plan to do anything with the back wall. However as we inched closer to the ceiling on that part of the basement we knew we had to do something. Here we’d sunk all this time and money into the walls, floors, and now ceiling it felt kind of dumb for us to leave another project on the docket.
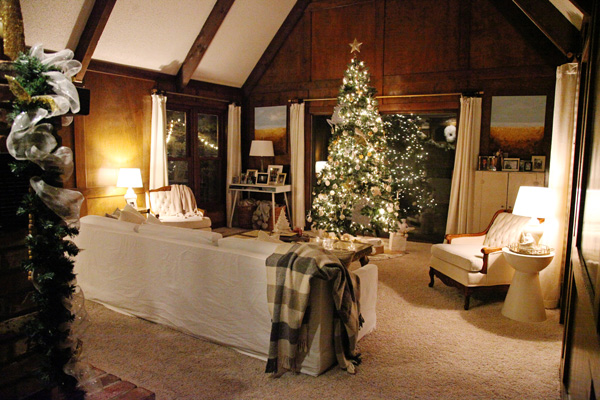
For reference the wall behind me in this photo is the wall I’m talking about.

The bead board on the wall was really loose, like you could lift it with your finger loose. After a lot of back and forth we thought it might be cool to create a DIY accent wall. Of course the ceiling is a painted mimic of our living room, so our hope was that it would all tie in together. We followed the same steps that we did on the ceiling; measure, attach luan, and then cover the seams with 1 x 4 routed boards. (For a full break down of the process click here to read my previous post about how we covered the popcorn ceilings with molding.) The difference was that this went pretty fast compared to the ceiling. Chris had the wall put together in a day.


Creating the accent wall wasn’t that hard, in fact Chris said it was easier than the ceiling because he wasn’t doing the work overhead. The first thing we did was pull down all of the bead board. This wall was very straight forward, especially since we were able to see exactly where the studs were. We marked the studs on the ceiling so we would have a reference and then decided where we wanted each square to be. We debated between bringing the middle ceiling beam straight down the back wall (4 squares) or splitting the difference and have 9 squares where the middle ceiling beam was in the middle of the top middle square. After taping it off and discussing it we felt like more squares made sense on the wall so that it seemed like a more intentional design decision.
You can see that before we completed this section of the ceiling we had to the do the wall first. Here is after we put up the luan squares on the wall and laid most of the border. We cut out an opening on the bottom right to include an access panel to the basement wall.

Because the studs were marked the 1 x 4’s went up very quickly on the back wall.


The other part we had to figure out what how to incorporate this little bump out on the left hand side. It is about 6 inches deep. We debated between ignoring it or including it in the design. In the end we decided to incorporate it into the design so that the squares would be more uniform in size and in relation to the ceiling. It was a little bit more work but definitely worth it.


The finished DIY accent wall looked better than either of us imagined and added SO much to the basement. The ceiling looked good but adding the back wall created a focal point back there that made the entire design feel intentional (and much less like a plain old basement). I am itching to show off the final before and after of the basement (I’ve been waiting 2 years after all!!!!) but there is one more DIY before I can hit publish on the big reveal. Click back on Thursday for that post and then next week will be a big beautiful post with allllllllll the after photos!
Don’t forget to pin!


Leave a Reply